- Published on
Access Cloud Remote with VSCode
- Authors
- Name
- Surya Harahap
- @suryaharahap18
Introduction
Hello folks, on this occasion. I will share about how to access a private cloud for development or production purposes.
Accessing the cloud remotely can expand my flexibility and productivity. In this short guide, I will discuss how to connect to the cloud to use Visual Studio Code (VSCode) via SSH.
There are many cloud service providers in the market today. Some of the leading cloud providers includeAmazon Web Services (AWS), Google Cloud Platform (GCP), Microsoft Azure, Alibaba Cloud, Digital Ocean, and others. 🙃
The choice of cloud provider can be based on individual needs, in this blog I will use Alibaba Cloud. The configuration is the same if you use Google, AWS, or Digital Ocean.
Previously, you must already have an Elastic Compute Service (ECS)! For those who are curious about what ECS is, you can go directly to this product ECS. ECS is a virtual machine computing service, similar to AWS with EC2 or Microsoft Azure with Virtual Machines. We can exercise full control over the computing environment, including operating systems, applications, network configurations and other resource management.
~ Okay let's GO, straight to the point 🙌🏻
Installation of SSH Remote Extensions
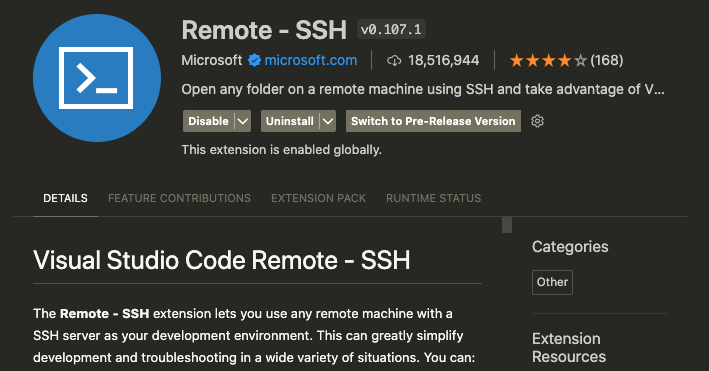
In this first step, you can directly open VSCode, go to the Extensions Marketplace, and search for ssh remote. Please install this extension to continue.


Configure SSH Connection
After the installation is complete, do the configuration first, by opening the Command Palette in VSCode or pressing cmd + shift + p on macOS > search connect to host > click Configure SSH Hosts > Select ssh configuration file /Users/surya/.ssh/config.


At this stage, if you see the configuration is empty, you can type the following:
Host CentOS7.9Dev
HostName 49.222.112.11
User root
IdentityFile ~/.ssh/namefile.pem
ServerAliveInterval 240
Explanation of each command in SSH configuration:
Host CentOS7.9DevThis is the name we give for the connection destination. For the naming friends here can be free anything.HostName Range_IP_eachThis specifies the IP address or host name of the server to be connected.User rootSpecifies the username (user) that will be used to log in to the server.IdentityFile ~/.ssh/namafile.pemIdentifies the location and file name of the SSH key that will be used for authentication on the server. This SSH key is a key related to the public key on the server, authentication without the need for a password.ServerAliveInterval 240Specifies the interval (in seconds) at which the SSH client (your computer) sends messages to the server to maintain the connection. In this case, every 240 seconds (4 minutes), the SSH client will send a message to the server to ensure the connection remains open.
Access Cloud Throudh VSCode
To access the connect server, you can press the Command Palette (ctrl + shift + p on macOS), Type Remote-SSH: Connect to Host and select the option.

Conclusion
Using VSCode to access the cloud via SSH can improve work efficiency. I am helped by the UI/UX of VSCode because there is a terminal that can directly edit the file through VSCode, cool right...eaaaa. 😂
By following these simple steps, friends can easily connect and manage projects in the cloud remotely. Thank you for reading this blog, hopefully, it can be useful for online friends and me personally if I forget how to do the config 👀🙃.
Oh yes, if you have any problems, feel free to contact me at [LinkedIn] (https://www.linkedin.com/in/suryaharahap/) 😊